Windows 11 user? Here are the Windows 11 Settings you should change right away.
Windows 10 Settings you should change
Whether you’ve got a new Windows 10 PC or just upgraded from Windows 8.1, everything starts with the Windows 10 Settings app. You can open Windows Settings from the WinX Menu or can simply open it by clicking the shortcut Win+I.
1] Look at Windows Update Settings
Apparently, forced updates are the most annoying and drastic change introduced with Windows 10. When it was released, Microsoft didn’t furnish Windows 10 Home users the ability to skip or pause any update. However, later on, Windows 10 Home users were allowed to stop automatic App updates, but they weren’t allowed to pause or stop Windows Update even then. We do not recommend that you disable automatic Windows Update in Windows 10. If your computer is fine with downloads in the background and doesn’t affect your work, it is not advisable to do it. But if you face a slowdown of the computer due to updates downloading and installing in the background, the above tip to change Windows Update settings will be of some help. Setting your network connection to Metered can stop Windows 10 from automatically downloading the Updates.
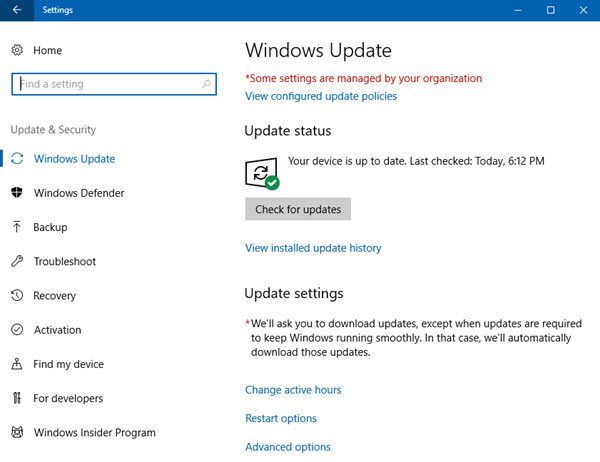
Open Settings >Network & Internet >Wi-Fi > Status > Change connection properties and then click on Metered connection. This is a sneaky way to disable Windows Update temporarily. You could also do this. Open Settings, now choose Update & security, and then click on Windows Update. Now click on Advanced options to manage your Windows Updates settings. First, you need to choose how updates are installed. Once you have updates to install, Windows estimates what can be a good time for a restart. However, Windows 10 lets you choose a time manually as well if you go with Notify to schedule restart. You can choose to defer or pause Windows Updates. Then there is this way, where you can make Windows 10 notify you before downloading updates. While here you might want to also check on the Choose how upgrades are delivered and ensure that your settings have not been changed. If you wish, you may move the slider to Off position to turn off Windows Update Delivery Optimization.
2] System Restore
The next important setting you need to check is if your System Restore is turned on. Please check if your System Restore function is disabled or not. If it is, you need to enable System Restore right away, as it is a very useful feature.
3] Manage Wi-Fi Sense
You need to check your Wi-Fi Sense settings. Wi-Fi Sense is a feature in Windows 10 that allows you to connect to your friend’s shared Wi-Fi connections. You can manage your Wi-Fi settings and decide whom the Wi-Fi details should be shared with, or you may turn off Wi-Fi Sense completely. I have turned it off, as I have no interest in sharing my Wi-Fi network details with my Facebook, Outlook.com or Skype contacts.
4] Cortana settings
Set up Cortana, your digital assistant. If you don’t plan to use it, disable Cortana.
5] Use the Battery Saver Mode
Make Windows 10 battery last longer. Use the new Battery Saver mode. When activated, the feature conserves battery life by limiting the background activity and adjusting the hardware settings.
6] Set default programs and browser
Don’t like using the built-in default apps or programs? Change default programs. You may want to set your default browser, change the default media player or any other program.
What Microsoft thinks is the best for you may not necessarily match your work mode and preferences. Luckily, you have the liberty to customize most default apps and settings in Windows 10.
7] Check Privacy Settings
This remains the biggest concern for many. Windows 10 not only syncs your settings to the cloud but also automatically shares the Wi-Fi password and collects data for relevant ads. Cortana also prudently watches your activities to be more helpful. Give the situation; you need to take a look at these settings and see if you are not comfortable with them. This post will show you in detail how to harden Windows 10 privacy settings. You may want to also disable Lock Screen Ads and Tips.
8] System Notifications
The notification area to the right bottom corner of your Taskbar keeps you updated about all your apps, your system, and everything else that needs your attention. If you find the app notifications disturbing, you may customize the app notifications. You may disable the notifications or even set their priority. You will see these settings under Settings > System > Notifications and actions. You can choose general notifications you want to see, as well as the apps. If you wish to customize your experience even further, click on individual apps to customize the types of notification including sounds and banners. Here you can switch the toggle to off for all the applications you don’t wish to be notified from.
9] Disable Web Search in Taskbar
When you search using the Taskbar search, local as well as web results using Bing are displayed. Some users may be okay with fact that web results are displaying additionally even when they don’t look forward to them. However, others may not be convinced by this fact. The reason behind this could be unnecessary data consumption by your system in order to fetch web search results. If you wish to disable web search results completely from being displayed in Windows 10 Taskbar search.
10] OneDrive integration
If you don’t like the fact that One Drive keeps appearing in your face, you could disable it or even completely remove it. We hope you find this post useful. Is there any other default setting in Windows 10 which you think needs to be taken a look at and maybe changed? Please let us know in the comment section below. Related reads: